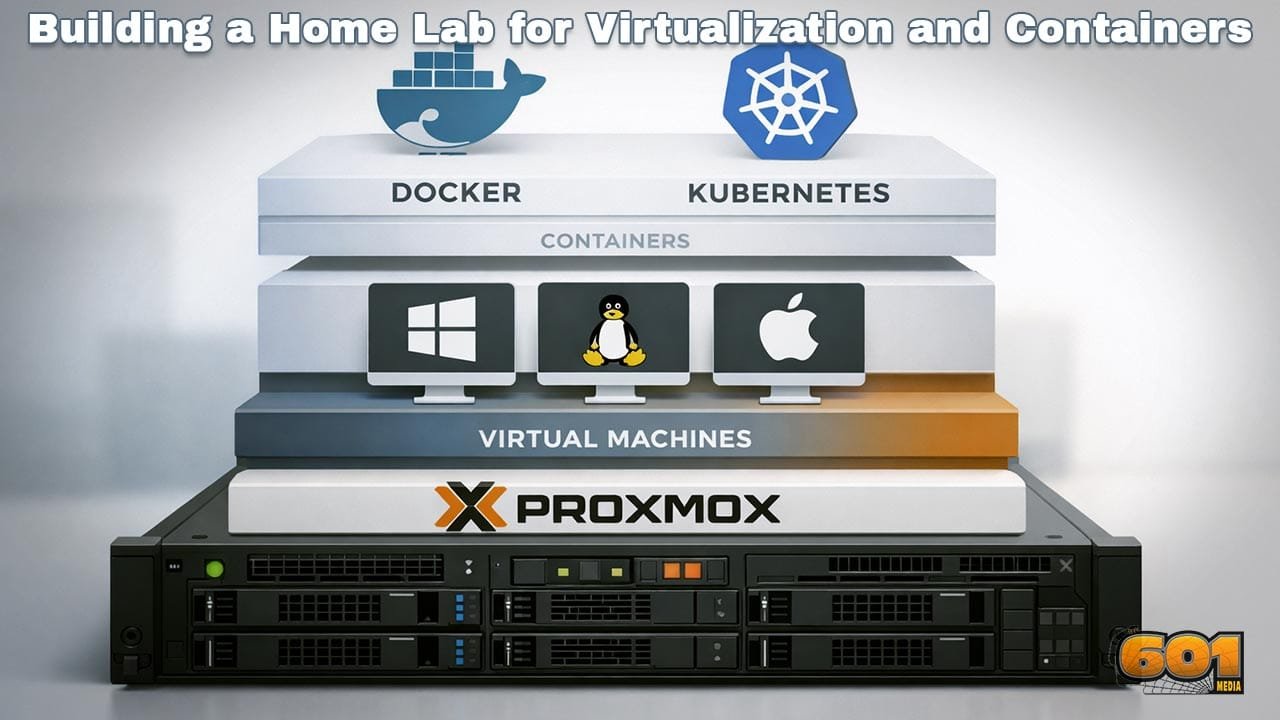
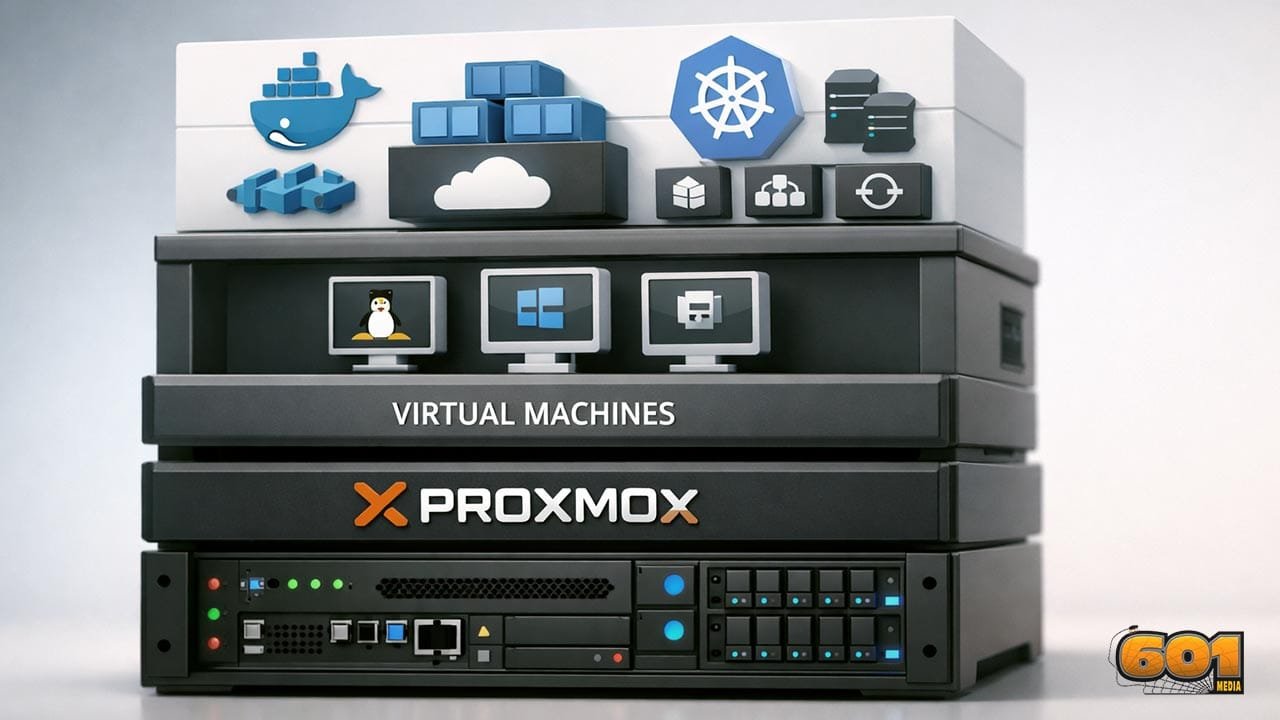
Building a Home Lab for Virtualization and Containers with Proxmox, Docker, and Kubernetes
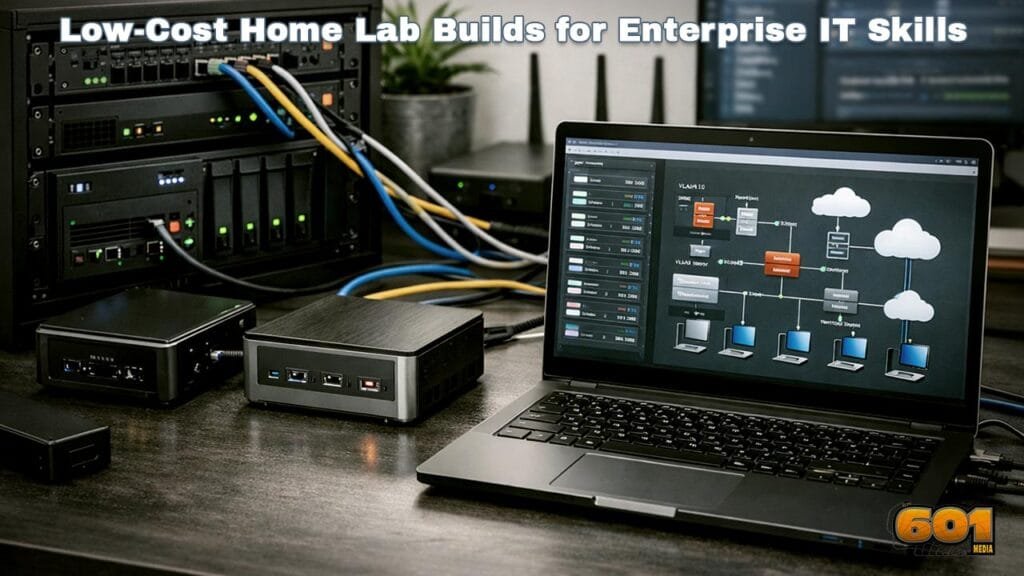
A well-designed home lab is one of the most effective ways to master modern infrastructure technologies. By combining virtualization and container orchestration in a controlled environment, you gain practical experience with the same tools used in production data centers, cloud platforms, and DevOps teams worldwide.
Table of Contents
- Why Build a Home Lab for Virtualization and Containers
- Hardware Planning and Sizing
- Network Design Fundamentals
- Installing and Configuring Proxmox VE
- Designing Virtual Machines for Containers
- Running Docker in Your Home Lab
- Kubernetes Architecture for Home Labs
- Storage Strategy and Data Persistence
- Security Best Practices
- Operations, Monitoring, and Maintenance
- Scaling and Future Enhancements
- Top 5 Frequently Asked Questions
- Final Thoughts
- Resources
Why Build a Home Lab for Virtualization and Containers
A home lab bridges the gap between theory and production-grade infrastructure. Virtualization allows you to run multiple operating systems on a single physical server, while containers provide lightweight, portable application packaging. Together, they form the foundation of modern IT operations.
Industry surveys consistently show that organizations adopting container platforms deploy applications faster, recover from failures more quickly, and reduce infrastructure costs. A home lab allows you to experiment without risk, simulate outages, practice upgrades, and understand failure modes that are difficult to grasp through documentation alone.
For professionals in innovation and technology management, a home lab also becomes a strategic asset. It enables evaluation of architectural trade-offs, capacity planning models, and automation workflows that directly translate to enterprise environments.
Hardware Planning and Sizing
Hardware selection determines the ceiling of what your home lab can achieve. While virtualization and containers are efficient, Kubernetes clusters and modern workloads still demand adequate compute, memory, and storage.
CPU cores are the first constraint. Virtualization benefits from higher core counts rather than high clock speeds alone. A minimum of eight cores is recommended for meaningful experimentation, while sixteen cores provide headroom for multiple virtual machines and control-plane components.
Memory is the most common bottleneck. Containers share the host kernel but Kubernetes nodes still require overhead. A practical starting point is 32 GB of RAM, with 64 GB offering far greater flexibility for multi-node clusters, monitoring stacks, and CI pipelines.
Storage performance directly impacts user experience. Solid-state drives are strongly recommended, especially for virtual machine disks and etcd-backed Kubernetes control planes. NVMe drives provide the best performance, but SATA SSDs remain viable for cost-conscious builds.
Energy efficiency should not be overlooked. Home labs often run continuously, making power draw a long-term cost consideration. Enterprise surplus hardware is affordable but can be significantly less efficient than modern consumer-grade CPUs.
Network Design Fundamentals
Networking is often underestimated in home labs, yet it plays a critical role in realism and scalability. At minimum, your design should support network segmentation, predictable IP addressing, and internal DNS resolution.
A simple but effective approach uses a managed switch or virtual bridges within the hypervisor. Separate networks can be created for management traffic, application workloads, and storage replication. This mirrors enterprise practices and reduces blast radius during misconfiguration.
Latency and bandwidth requirements increase as you introduce distributed systems. Kubernetes relies heavily on east-west traffic between nodes, making stable internal networking essential. Even a single physical server benefits from logically separated networks to simulate real-world conditions.
Installing and Configuring Proxmox VE
Proxmox VE serves as the foundation of the home lab. It combines a Linux-based hypervisor with a powerful web interface, clustering capabilities, and integrated storage management.
Installation is straightforward, but early decisions matter. Disk layout should prioritize flexibility, allowing room for snapshots and future expansion. ZFS is a popular choice due to its data integrity guarantees and snapshot features, though it requires sufficient memory to perform well.
Once installed, configure network bridges to support both virtual machines and containers. Time synchronization, DNS settings, and user access controls should be established immediately to avoid operational drift.
Proxmox clusters enable live migration and high availability. Even in a single-node lab, understanding clustering concepts prepares you for multi-node expansions and enterprise-grade deployments.
Designing Virtual Machines for Containers
Running containers directly on the hypervisor is possible, but most home labs benefit from a layered approach. Virtual machines provide isolation, operating system flexibility, and safer experimentation boundaries.
A common pattern is to deploy lightweight Linux virtual machines dedicated to container workloads. These machines become Kubernetes nodes or Docker hosts. Resource allocation should be conservative initially, allowing overcommitment while monitoring performance.
Operating system choice matters. Minimal distributions reduce attack surface and resource usage. Consistency across nodes simplifies automation, patching, and troubleshooting.
Snapshots are invaluable. Before major upgrades or configuration changes, snapshots allow rapid rollback, encouraging experimentation without fear of irreversible damage.
Running Docker in Your Home Lab
Docker is often the entry point into containers. In a home lab, it excels at running single-host workloads, development environments, and supporting services such as databases, reverse proxies, and monitoring tools.
Docker Compose enables declarative service definitions, making it easy to spin up multi-container applications. This practice reinforces infrastructure-as-code principles and simplifies recovery from failures.
Resource limits should be explicitly defined. Without constraints, containers can consume all available memory or CPU, destabilizing the host. Learning to apply quotas mirrors production best practices.
Docker also serves as a stepping stone to Kubernetes. Understanding container images, registries, and networking fundamentals reduces complexity when transitioning to orchestration platforms.
Kubernetes Architecture for Home Labs
Kubernetes introduces orchestration, self-healing, and scalability. In a home lab, it enables experimentation with microservices, rolling updates, and service discovery.
A typical home lab cluster consists of one control-plane node and multiple worker nodes. While single-node clusters are useful for learning, multi-node setups reveal real scheduling, networking, and failure behaviors.
Control-plane components require stability and reliable storage. Worker nodes benefit from consistent hardware profiles to simplify scheduling decisions. Container networking plugins should be chosen carefully, prioritizing simplicity and community support.
Resource planning is essential. Kubernetes reserves resources for system components, reducing capacity available to applications. Understanding these reservations prevents overcommitment and unexpected performance issues.
Storage Strategy and Data Persistence
Persistent storage is one of the most challenging aspects of containerized environments. Stateless applications are simple, but real workloads require durable data.
In a home lab, network-attached storage, distributed file systems, or hypervisor-backed volumes are common solutions. Each has trade-offs in performance, complexity, and resilience.
Kubernetes persistent volumes abstract storage details from applications, but underlying reliability remains critical. Testing backup and restore workflows is just as important as initial deployment.
Snapshots, replication, and off-site backups protect against both hardware failure and operator error. A home lab provides a safe environment to validate these strategies before enterprise adoption.
Security Best Practices
Security should be integrated from the beginning. Even isolated home labs are exposed to risks through misconfiguration, outdated software, or insecure credentials.
Access control is foundational. Principle of least privilege should apply to hypervisor access, virtual machines, and cluster roles. Strong authentication and role separation reduce accidental damage.
Network policies, firewalls, and service isolation limit lateral movement. Container security scanning identifies vulnerable images before deployment, reinforcing secure supply chain practices.
Regular patching and upgrade cycles should be treated as routine operations. Practicing these workflows in a home lab builds confidence and operational maturity.
Operations, Monitoring, and Maintenance
Operational excellence distinguishes experimental labs from production-ready platforms. Monitoring resource usage, service health, and logs provides visibility into system behavior.
Metrics collection enables capacity planning and performance optimization. Alerts highlight issues before they escalate into outages. Log aggregation simplifies troubleshooting across distributed components.
Documentation is often overlooked but essential. Recording architecture decisions, configurations, and recovery procedures transforms a personal lab into a reusable knowledge base.
Maintenance windows, even informal ones, reinforce disciplined operational habits and reduce unplanned downtime.
Scaling and Future Enhancements
A well-designed home lab evolves over time. Additional nodes, faster storage, or segmented networks can be introduced incrementally.
Automation becomes increasingly valuable as complexity grows. Configuration management, infrastructure-as-code, and CI pipelines reduce manual effort and configuration drift.
Advanced experiments may include high availability, disaster recovery simulations, or hybrid cloud integrations. These scenarios deepen understanding of real-world constraints and architectural trade-offs.
Ultimately, the home lab becomes a platform for continuous learning, innovation, and strategic experimentation.
Top 5 Frequently Asked Questions
Final Thoughts
Building a home lab for virtualization and containers is not about replicating a data center at home. It is about creating a safe, flexible environment to understand systems deeply. By combining Proxmox, Docker, and Kubernetes, you gain hands-on experience with the technologies shaping modern infrastructure. The most important takeaway is not tooling mastery, but architectural thinking. A thoughtfully designed home lab develops intuition for performance, reliability, and scalability that cannot be learned through theory alone.
Resources
I am a huge enthusiast for Computers, AI, SEO-SEM, VFX, and Digital Audio-Graphics-Video. I’m a digital entrepreneur since 1992. Articles include AI researched information. Always Keep Learning! Notice: All content is published for educational and entertainment purposes only. NOT LIFE, HEALTH, SURVIVAL, FINANCIAL, BUSINESS, LEGAL OR ANY OTHER ADVICE. Learn more about Mark Mayo